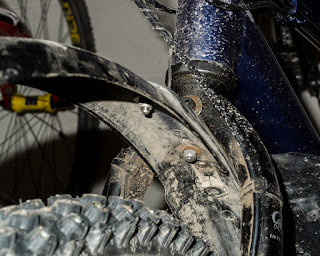
Usually, I end up putting frankenfenders on my bicycles when I decide to use a fender. You see, the problem I have is that often I am attempting to attach a fender to a bike that is not really made for fenders (or, at least, is not made for fenders and a rack at the same time - like my Kona Jake the Snake) or does not have enough room for proper fenders and studded tires (like my Kona Dew City).
Sometimes, though, the frankenfender job is needed because the fenders I picked do not do the job as well as I would like.
The front fender which currently sits on my commuter mountain bike is a good fender. It is wide enough to cover the full width of a Schwalbe Ice Spiker 2.1 tire and, when combined with the splash guard on the down tube, keeps most of the crud thrown up by the tire off of me. Only a tiny bit gets on my boots. I don't mind this as I deliberately opted for a fender that fits with huge space between the tire and fender so some slop is expected.
The problem I had with it was that the front of the fender did not stick out anywhere near far enough to deflect spray tossed forward by the tire. It was flying quite high in front of the bicycle, and I was riding into it.
So, I needed to extend the fender enough to prevent spray.
Here is what I came up with.
I, however, like the Mad Max look for my commuter bicycles. They get left outside while I am shopping, out for coffee, getting groceries, and sometimes at work. I don't want a bicycle that costs a fortune to do this, and don't want a bike that looks flashy even if it is inexpensive. The kind of mods I do make the bike distinctive looking, and "mine", without adding to the desirability factor all that much.
Some would argue that removing the suspension fork and adding a rack and fenders forever removes the cool from the bike.
To that I say good.


Awesome. Perfect. Cycling in the snow allows for any and all breaking of convention! +1 on avoiding snow buildup rub/clog action. I just finished a rear fender hack of my own... perhaps I'll post on it soon.
ReplyDeleteI would love to see it. I have done a significant rear fender hack - it is made of three parts - which I am going to highlight tomorrow and explain the whys and wherefores after I get some pictures of the bike with some snow build up :)
DeleteI'm glad I'm not the only one doing this kind of thing. I've got a severely muddy offroad habit and also ride the same bike to work. So it's a hardtail with schwalbe smart sams and a pannier rack. I chose a pannier rack which had a flat tray-like bed and then sawed-up a £20 rear mudguard to get the last 4 inches of it which I cable-tied to convenient holes at the back of the rack. My back is always immaculately preserved now.
ReplyDeleteAt the front, I had to use a heavy hammer to bend the bracket on the Proline DH two-part mudguard to enable it to fit. And then more hammering to fix the bracket's curve to match the wheel and fit under the downtube.
The whole effect is very gnarly.
Currently looking for a new front mudguard to save my suit from splatters when the front wheel is turned out from under the downtube